Projekt HugLamp

Hier das Beispiel script für das Relay.

#!/usr/bin/python

# Das Programm nutzt die GPIO Zero Library 
# Das Relay wird mit einem der GPIO Ports verbunden und dann als Output device definiert
# https://forums.erfindergarden.de/t/projekt-huglamp/480/19

import sys
from time import sleep
import gpiozero

RELAY_PIN = 21

relay = gpiozero.OutputDevice(RELAY_PIN, active_high=False, initial_value=False)

while True:
        relay.on()
        sleep(5)
        relay.off()
        sleep(5)

crontab -e dann das eintippen

#@reboot python /home/pi/libfreenect/wrappers/python/kinect_hugme_v2.py

Ich stelle jetzt noch die Min und Maxima der Blobs ein mit der Stange bei der Tram. Ist so 3 Meter hoch.

@maxl @andreasK File läuft leider nicht wie erwartet

Habe die umlaute aus max file entfernt, aber hier tut sich nichts, FGMask zeigt nichts an, er wartet auch wieder auf key for next loop, listet dann 45 blobs ? aber kein Event, keine nachvollziehbare Erkennung

kinect_hugme_v2.py (7.1 KB)

1 „Gefällt mir“

Ich habe jetzt Endlich das kinect_hugme_v2.py script als autostart zum laufen gebracht mit screens und zwar so. Nach der Anleitung hier https://learn.sparkfun.com/tutorials/how-to-run-a-raspberry-pi-program-on-startup/all

sudo nano /lib/systemd/system/hug.service

    [Unit]
Description=Start Clock

[Service]
Environment=DISPLAY=:0
Environment=XAUTHORITY=/home/pi/.Xauthority
ExecStart= python /home/pi/hugme/running_code/kinect_hugme.py
Restart=always
RestartSec=10s
KillMode=process
TimeoutSec=infinity

[Install]
WantedBy=graphical.target

danach …

sudo systemctl daemon-reload (das muss man auch machen wenn man den Dateinamen ändert den man autostarten will)

danach

sudo systemctl enable hug.service

und noch

sudo apt-get install at-spi2-core

Leider hab ich festgestellt dass er das script wenn die Fenster an waren immer nicht richtig ausgeführt hat sondern es ist immer nur ein Fenster aufgegangen aber mit nix drin. Also hab ich noch ein bash script gemacht und dass mit crontab -e autstarten lassen.

sudo nano restart.sh

#!/bin/bash

echo  "stop"

sudo systemctl stop hug.service

sleep 2

echo  "start"

sudo systemctl start hug.service

und jetzt noch das sh script zum executable machen …

sudo chmod +x restart.sh

und dann in crontab -e

@reboot sleep 30 && /home/pi/restart.sh &

und ich hatte noch vergessen dass ich xterm installiert hatte

sudo apt-get install xterm -y

Mit sudo systemctl start hug.service kann man dann testen ob das script auch startet.

Ich habe nochmal den Dropbox uploader aktiviert und das ist der Folder. Leider ist die der noch bei Max seinem Pi aktiviert das er in Ibiza dabei hat und er hat mir gerade alte Fotos hochgeladen.

Zur Installation dieser Anleitung folgen.

Und dann Script folgendermaßen starten. Mit dem -s stellt man sicher das Dateien nicht doppelt hochgeladen werden. In den meisten Anleitungen war nicht genau beschrieben wie man die Target Path erstellt. Die Dateien werden direkt in die Folder der App geschrieben dir man vorher erstellt hat. Am besten man schreibt einfach nur ./Dann wird es direkt in den App Folder geschrieben. Es muss aber unbedingt ein Target folder definiert werden.

./dropbox_uploader.sh -s upload /home/pi/kinect ./

Mit Cron kann man das ganze dann noch Automatisieren dass jede Minute checkt ob neue Bilder im Folder sind. Dann könnte man noch einen cleanup crontjob einstellen dass die Fotos wieder löscht.

crontab -e

*/1 * * * * /home/pi/Dropbox-Uploader/./dropbox_uploader.sh -s upload /home/pi/kinect ./

1 „Gefällt mir“

Jetzt bin ich gerade am checken an was es liegt dass das relay nicht auslöst. Wir müssen reinbauen, dass man besser erkennt wenn er Blobs erkennt. Am besten mit Rechtecken um die Blobs und auch mit einer Anzeige wenn sich die Abstände ändern. Außerdem müssen wir unser Script mit dem von Nikolas vergleichen und sehen ob wir da irgendeinen Fehler machen und ob man das gleiche was wir in Max seinem script schon mit opencv Funktionen machen können.

  • scripte Vergleichen und Fehler suchen
  • einbauen dass man auch aufgenommen Bilder verwenden kann
  • script dass rgb und depth Images vergleicht fixen
  • alles Testen dass es auch im livesetup funktioniert

aktuelle Scripts …

fgbg.py (1.7 KB)
kinect_hugme_v2.py (7.1 KB)

1 „Gefällt mir“

Zum Testen habe ich jetzt nochmal opencv 3.2.0 und python 2.7 auf meinem Mac zum laufen gebracht.

python
import cv2
((cv2.__version__)
1 „Gefällt mir“

Some information what we do with the RGB image we get from the Kinect camera and how we are detecting blobs.

1. We get one image of the camera
2. Background Substraction

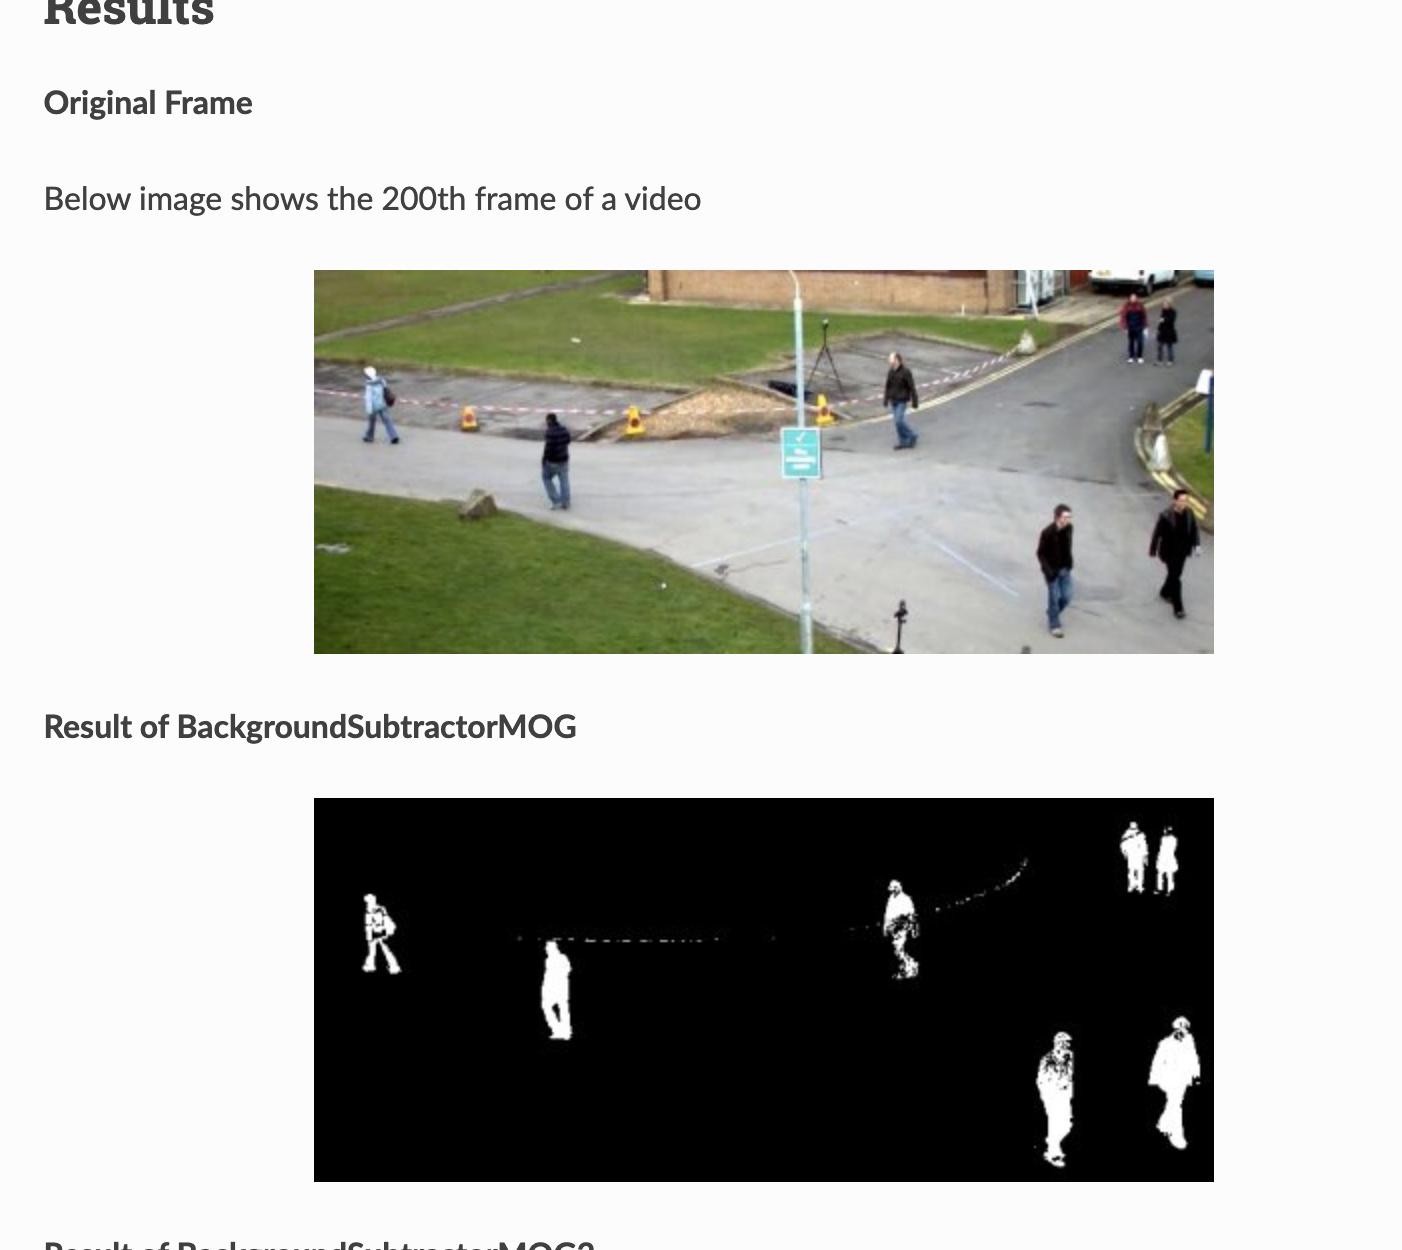
To only get the moving parts of an image we do a background substraction.
This is like green screening. We only want to get out the interesting information of the image.

https://opencv-python-tutroals.readthedocs.io/en/latest/py_tutorials/py_video/py_bg_subtraction/py_bg_subtraction.html

We use the module cv2.createBackgroundSubtractorKNN() we could also use cv2.createBackgroundSubtractorMOG2().

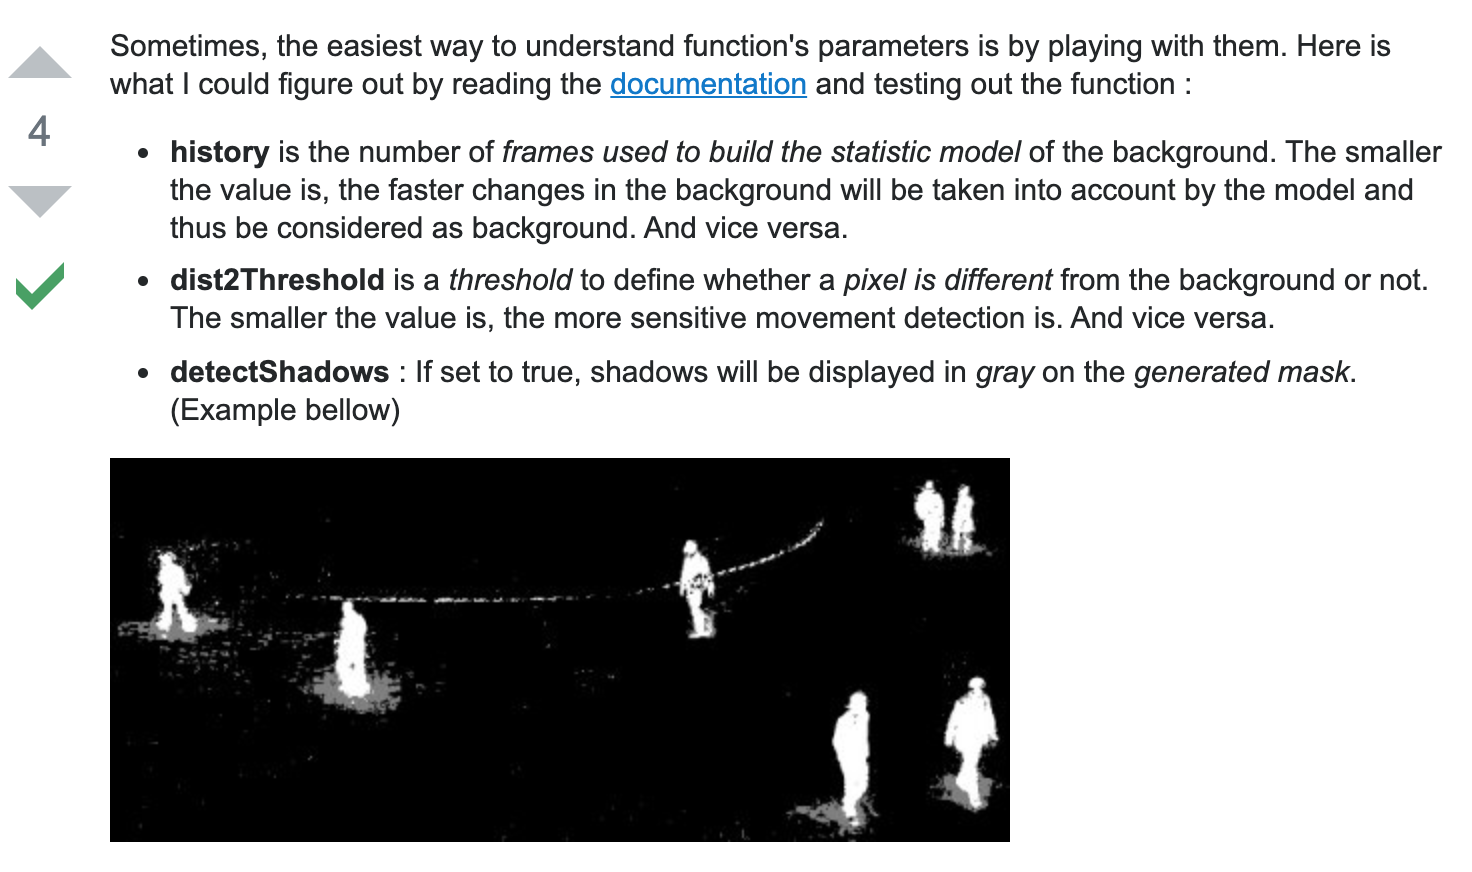
The Standar paramenters of KNN are this

cv2.createBackgroundSubtractorKNN(history=500, dist2Threshold=400.0, bool detectShadows=true)

There is another Parameters that we can set which is the Learning Rate. We have the option to chose -1 for auto, 0 background model is not updated at all, 1 means that the background model is completely reinitialized from the last frame.

3. Image Thresholding

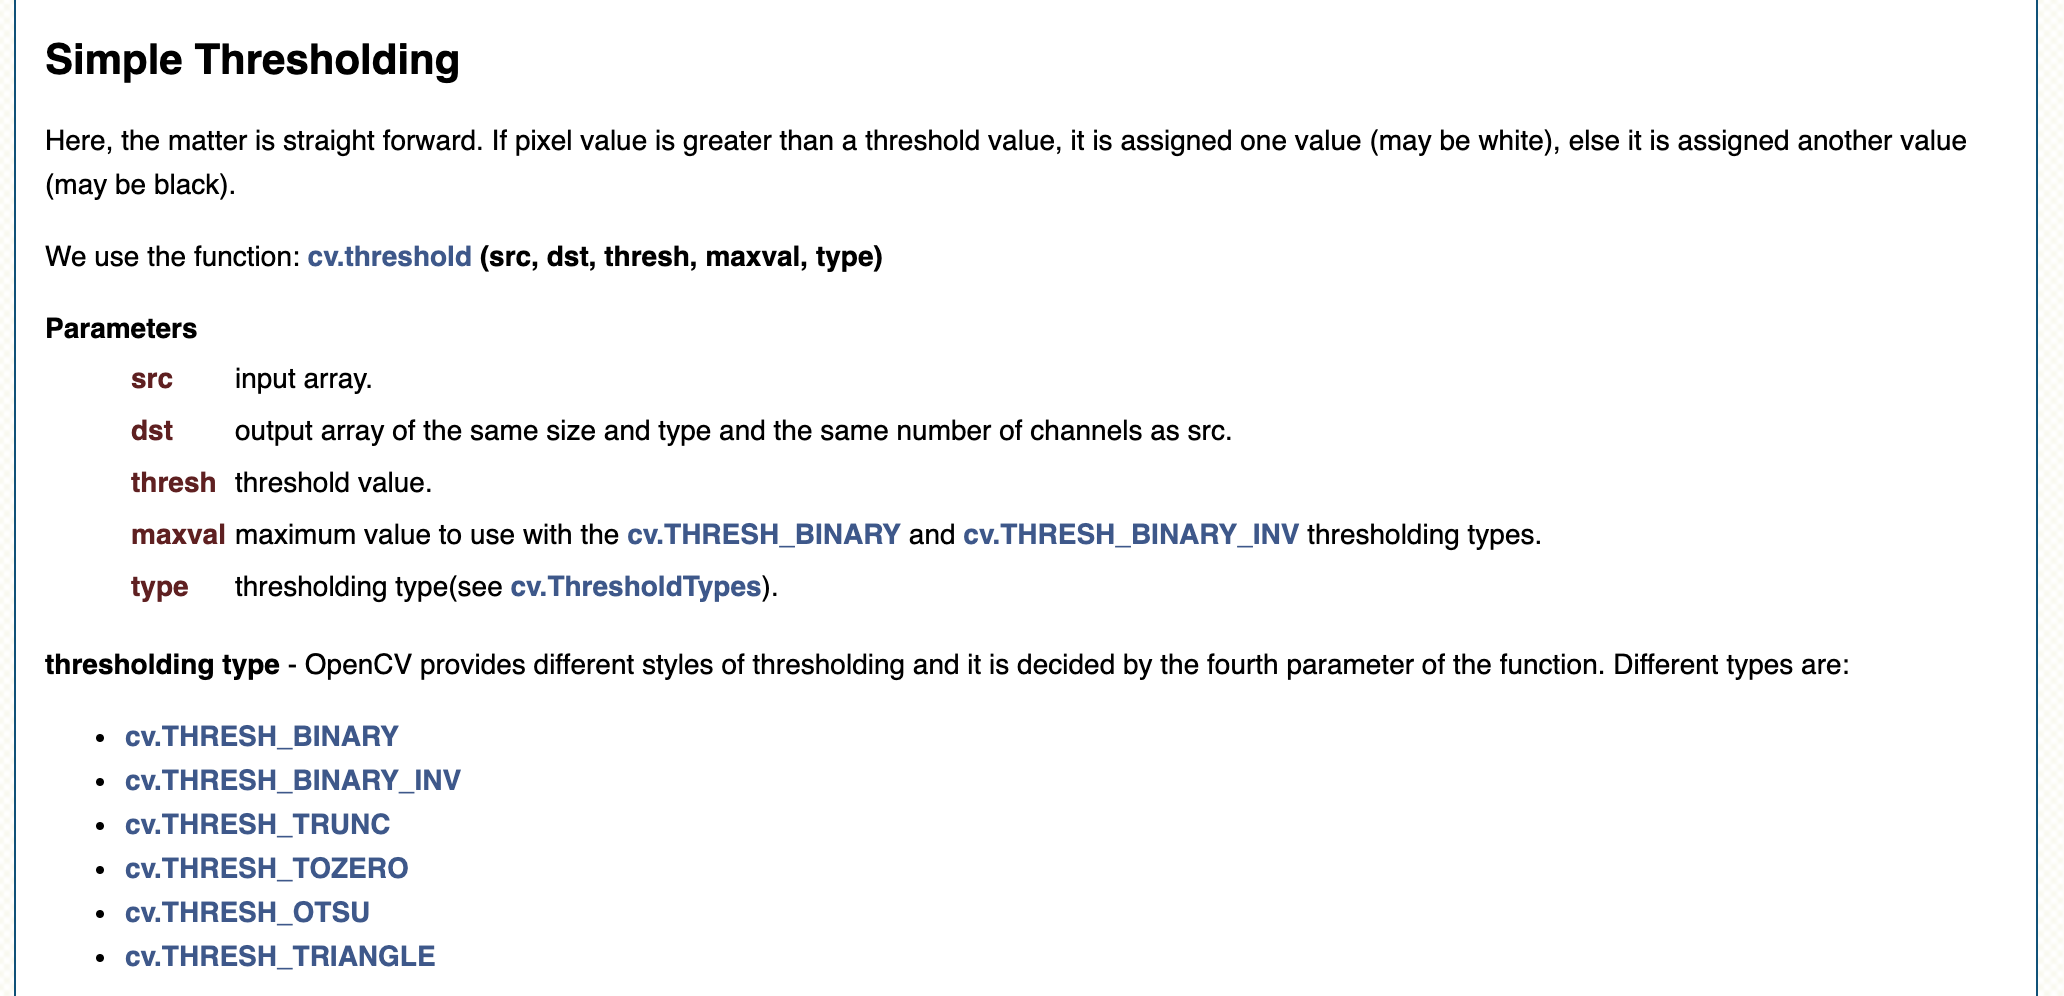
We do this thresholding to get rid of any colors that are too close to the background color black. It seems there are only some grey pixel left after the background subtraction if we leave shadows on. If we disable shadows I think we do not need this threshold. Everything lighter then 127 will be set to 255 (white) everything below 127 will be set 0 (background).

cv2.threshold(src, thresh, maxval, type[, dst])

cv2.threshold(fgMask,127,255,cv2.THRESH_BINARY)

This is a great website to test the threshold
—> https://docs.opencv.org/master/d7/dd0/tutorial_js_thresholding.html

https://docs.opencv.org/2.4/doc/tutorials/imgproc/threshold/threshold.html

4. Then we use some Morphological Transformations

The transformations need two inputs. One is the original image, the second one is called structuring element or kernel which decides the nature of operation.
The kernel slides throught the images and

kernel = np.ones((3,3), np.uint8)

  • erode: erodes away the boundaries of a forground image, takes cares of our white noises (we do not use it in the end because the method connectedcomponetswithstats() does not like it.
  • dilate
  • morphological ex

https://docs.opencv.org/trunk/d9/d61/tutorial_py_morphological_ops.html

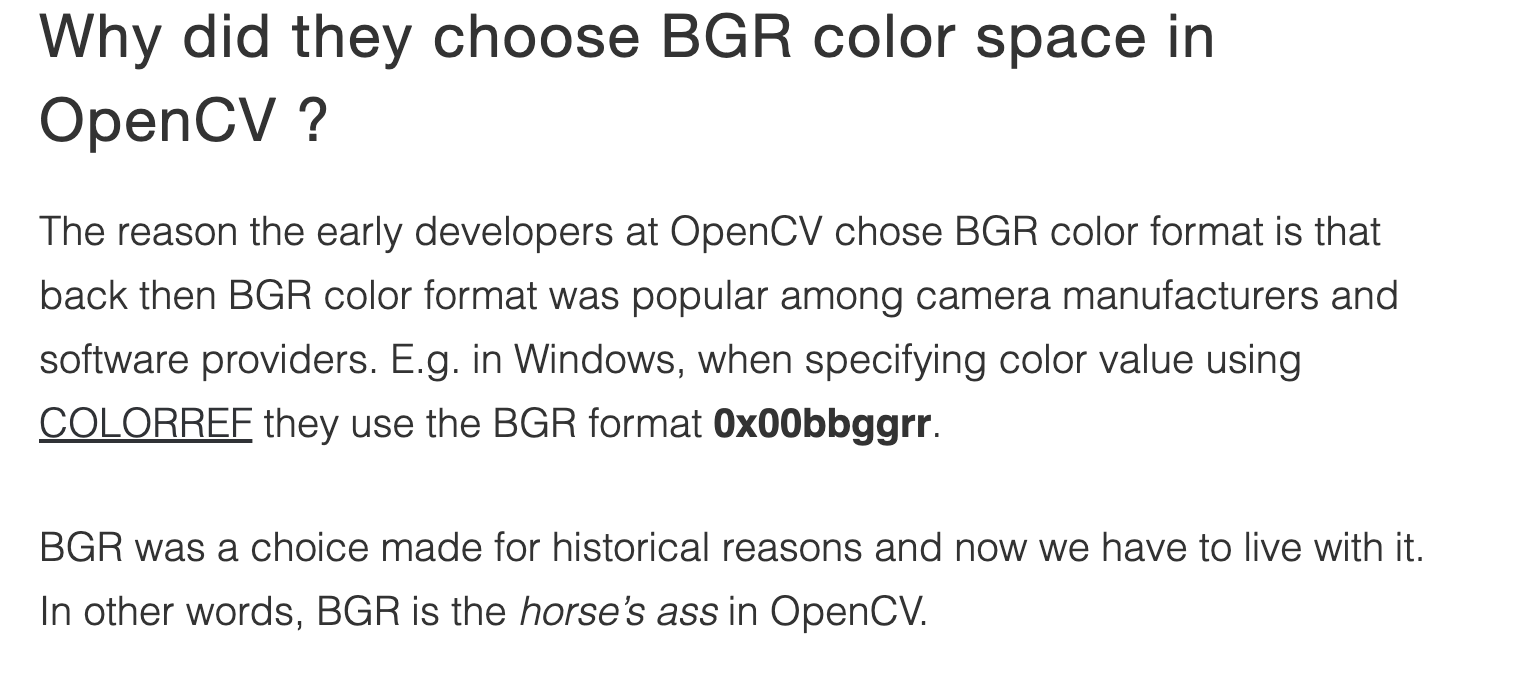
  1. Greating a Colorspace in BGR

We add color so we can draw some colored boxes around the blobs later.

We change the colorspace from Grayscale to BGR and assigned it to the variable col.

BGR is the colorformat that is used in OpenCV.

cv2.cvtColor(fgMask, cv2.COLOR_GRAY2BGR)

https://opencv-python-tutroals.readthedocs.io/en/latest/py_tutorials/py_imgproc/py_colorspaces/py_colorspaces.html

4. Blog detection

With cv2.connectedComponentsWithStats() we then detect the position and size of the blobs. An alternative would be cv2.findcontours() but this only gives us the points of the line around he blobs and we would need to calculate the size and the position by hand.

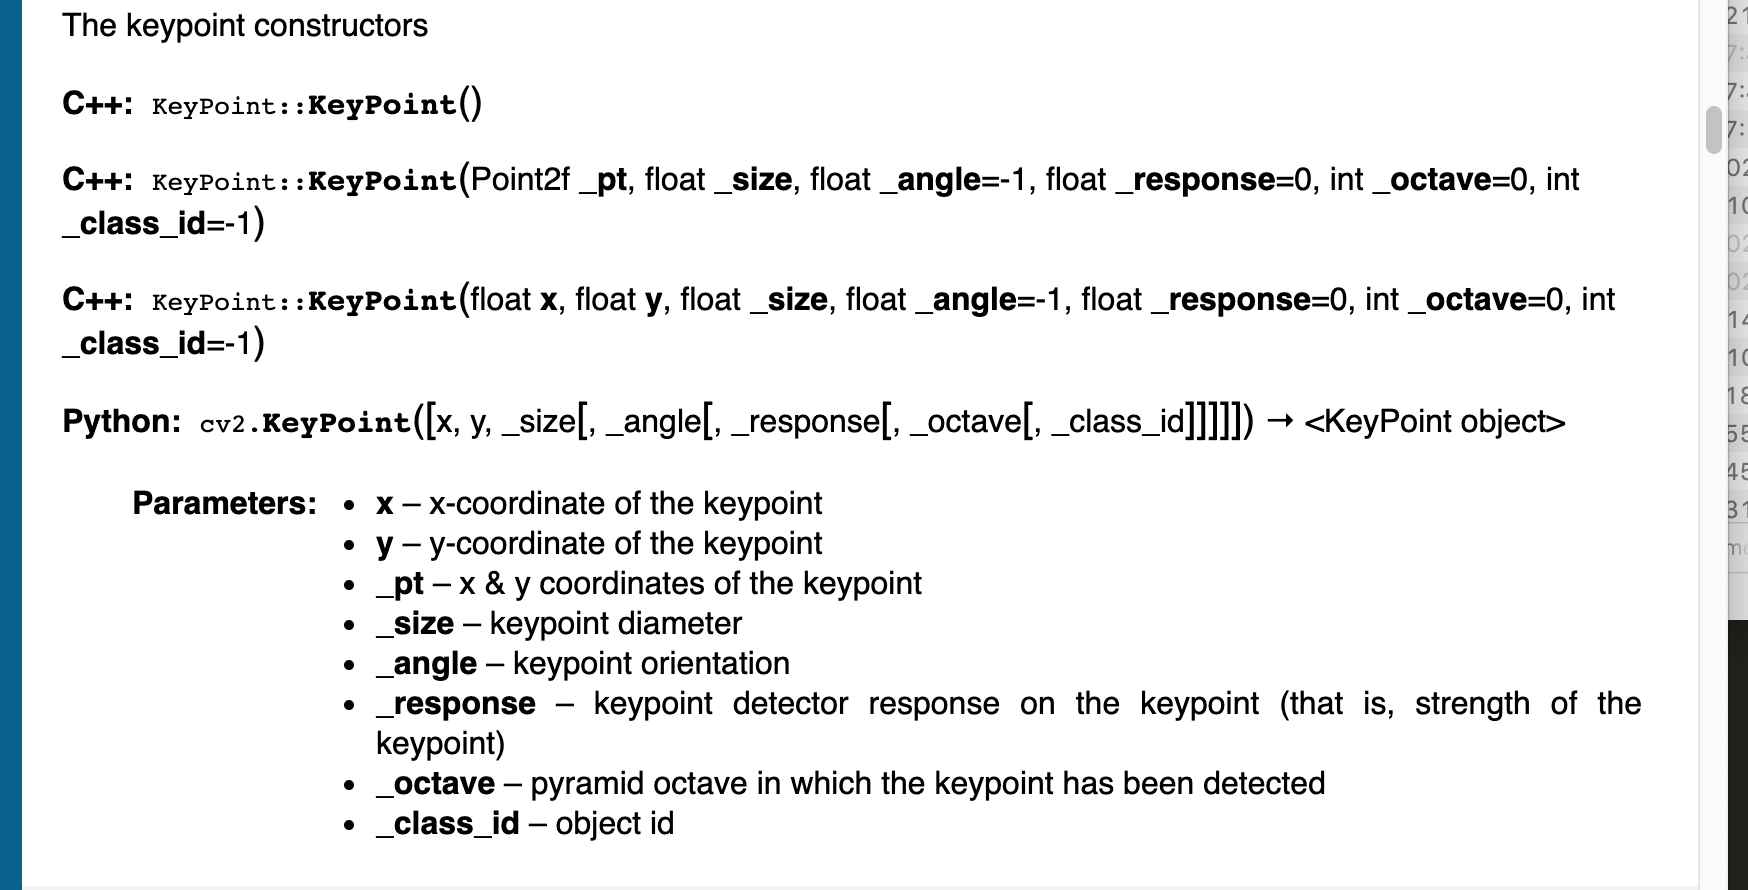
There is also the cv2.SimpleBlobDetector() this also works also with our opencv version (3.2.0) we have on the pi. With this method we will try to do a script that triggers the relay if a blob is at a certain size .

https://docs.opencv.org/3.4/d0/d7a/classcv_1_1SimpleBlobDetector.html

https://docs.opencv.org/master/d5/daf/tutorial_py_histogram_equalization.html

So, ohne Erode funktioniert die Erkennung im RGB Bild deutlich besser. Hier der Code dazu. Relay Funktion habe ich zum testen deaktivert. Andi, du musst entsprechend das dann nochmal abändern.

kinect_hugme_v3.py (7,8 KB)

1 „Gefällt mir“

Es funktioniert! Ich mache jetzt einen git ordner und dann müssen wir noch das noch mit dem Tiefenbild heute Abend checken. Also RGB funktioniert. Beim Tiefenbild geht es noch nicht so gut.

1 „Gefällt mir“

Drawing on the image

We want to draw contours around the blobs that the program recognizes

Because we have made the picture binary we first need to add some color again.

col = cv2.cvtColor(img, cv2.COLOR_GRAY2BGR)

cv2.putText(col,'Hello World!', 
    bottomLeftCornerOfText, 
    font, 
    fontScale,
    fontColor,
    lineType)

Ich hatte probleme die opencv Software mit einer IDE wie pycharm zum laufen zu bringen, deswegen nutze ich IDLE. Um dort wiederum die Packete in imutils und opencv in Idle nutzen zu können hat mir diese Anleitung geholfen …

Hier ein paar Ideen wir wir Plötzliche Lichtänderung in den Griff bekommen könnten …

https://answers.opencv.org/question/29088/motion-detection-false-alarms-from-light-changes/

1 „Gefällt mir“

Auch habe ich mir gerade die imutils angeschaut und kann zumindest damit die größe der Frame leicht einstellen …

Eine Idee ist auch dass die Leute einen Hut aufsetzen Tagsüber der eine bestimmte Farbe hat. Die Farben können wir einfacher tracken …

https://docs.opencv.org/3.1.0/df/d9d/tutorial_py_colorspaces.html

Gelb wäre …

Da wir ja of kleine Objekte na beieinander haben ist glaube ich der Yolo nichts für uns. Der Teilt ein Bild in so ein Grid auf. Aber kann man mal ausprobieren. Auch ob das in realtime so gut mit den Pis weiß ich nicht.

Ich verstehe langsam wie man mit den Keypoints arbeitet die man bei cv2.SimpleBlobdetector() rausbekommt.

Ganz verstehe ich es aber noch nicht.

1 „Gefällt mir“

Update 24.9.2019:

The installation is working fine this are the things we still need to fix.

  • during day time we have problems with sudden changes of light so we need some normalization technique or when there is a sudden light change registered reset the background model

  • we have some problem when many people are in the installation

  • we need to add contours of then blobs to the debugging windows so we can easier see whats going on

  • we need to add some logging so we see when the light was triggered

  • we need to find out why the background substraction turns white at night. Maybe it turn off rgb at a certain time

1 „Gefällt mir“